


When I was first learning how to write Wilson Reading System lessons, I felt overwhelmed and often confused. I had only one student to teach, and planning for them took me hours that I didn’t really have available! However, I ended up restarting my practicum with a new student when I changed jobs, which gave me an extra dose of supervised experience. That second chance, along with my tendency to dive all in on new organizational systems, helped me quickly become comfortable writing my own Wilson lesson plans.
If you search for Wilson Reading System lesson plan ideas, you’ll mainly find supplemental materials that do not come from Wilson Language Training. As certified practitioners, we don’t want to dilute our instruction or negate what we learned in our practicum. We just want to streamline lesson plan writing so the task feels less overwhelming! This post is intended to help you discover a few strategies that will make the process a little bit easier, and give you back some time without taking away from the prescriptive nature of the program’s instruction.
Using a different program? These tips will be helpful for anyone teaching with a diagnostic, prescriptive literacy approach where every lesson is built specifically for each child or group.
Some disclaimers: I am not affiliated with Wilson Language Training. I’m just really passionate about teaching WRS! The advice I offer in this post assumes that you are in or have completed the Level 1 practicum. This post does not discuss how to teach Wilson or how to introduce new concepts, but how to write your Wilson Reading System lessons with more efficiency. The suggestions do not cover all aspects of a Wilson lesson, so please use your training to fill in what I have left out. Next, you may notice that any visuals in this post are my own recreations of relevant sections, not photos or scans of the actual Wilson lesson plan template.
This post may contain Amazon affiliate links.
Here are my top tips for writing your own Wilson Reading System lessons!
Strategy #1: Have Systems in Place.
The most important system will be where you keep your teacher materials. Personally, I choose to use a large binder. I include one section for each student (or group) and master copies of things I might need in a pinch (dictation pages, extra charts). I also include lots of extra blank lesson plans.
The sections for individual students or groups have specific items in them. First and foremost is the completed lesson plan for their next lesson, as well as 5-8 blank lesson plans so I’m never scrambling for a new one.
In addition to the lesson plans, I keep several tracking sheets for each student (or group). Over time, I have trialed different solutions, aiming to discover how to save time writing lesson plans without diluting the quality of my instruction. I noticed the things that slowed me down while writing lesson plans:
- I couldn’t remember which vocabulary words we added to the notebook.
- I was tired of flipping through various books to remember which high frequency words each student or group was working on.
- I couldn’t remember which notebook entries we made, and which ones we still needed to add in a future lesson.
I recognized that these issues were making me less efficient, so I made myself checklists. Making checklists has always been an effective strategy for me, and there are several parts of Wilson instruction that lend themselves well to the use of checklists.
- A tracking sheet for the high frequency words sorted by substep: I make note of their reading and spelling mastery of each word. This allows me to quickly decide which words to review, which ones to add to the notebook, and which ones I don’t need to worry about.
- A tracking sheet to jot down the vocabulary words that students add to their notebook in each substep. This helps me to choose vocabulary words for review, and to put together activities that incorporate past vocabulary words across the substeps.
- A notebook entry checklist: Some substeps have multiple notebook entry checklists, like syllable division rules and syllable type exceptions. Once I was confident enough to teach without having my manual handy, I still needed a quick reference to make sure that all notebook entries are being made.
- A list of concepts to address in each substep: Some substeps have layers of skills that we need to address. Think of substep 3.1. It’s all about two syllable words with two closed syllables, but we need lessons on compound words, rabbit words, camel words, closed syllable prefixes, and schwa. We also need to address spelling patterns like –ic, s for /z/, and when to use –ck and bonus letters in two syllable words. It slowed me down to repeatedly flip through my manual to see what was next, so once I was confident teaching without the manual, I began using the checklist to keep me on track instead.
Strategy #2: Always have a blank lesson plan handy.
In my teacher binder, I always have my current lesson as well as several blank lesson plans for each student or group. Over time, I became more comfortable jotting things down on the next blank lesson plan while teaching. As I became more confident teaching my lessons, the procedures became routine to me and I had the brain space to jot notes on the next blank lesson plan while teaching the current lesson.
Don’t rush this, and recognize that maybe your brain doesn’t work this way. You don’t want to be distracted by your lesson planning while your student is waiting expectantly (or goofing off), waiting for you to move on. However, you might notice that while your student adds an illustration to their vocabulary entry, colors in their chart, or writes a dictated sentence, you have a few seconds to jot down notes for the next lesson.

Strategy #3: Look for Patterns.
Now that you have some systems in place, let’s think about the act of writing your next lesson. Several of the next strategies we’ll cover will use your ability to recognize the cause-and-effect relationships between today’s errors and tomorrow’s focus concepts. When you consciously look for them, you’ll begin to recognize the sequential patterns that take an introductory concept or word from today and become tomorrow’s review. This concept of looking for patterns will be woven through the rest of the blog.
Strategy #4: Take Good (or Decent) Notes.
During my practicum, I was overwhelmed by the expectations of note-taking on my lesson plans. With only one Wilson student, I could easily recall how my student performed on each task. It felt silly to write a note on each and every section. However, once I began working with multiple students using Wilson Reading System lessons, I was grateful that I had come up with a system for my notes. When you’re teaching five, ten, or fifteen different students or groups each week, it becomes too hard to recall how each student did on each part of the lesson.
Taking good notes helps you easily plan Wilson Reading System lessons in two ways. If you note that your student did well on something today, you can consider moving on to the next layer of instruction tomorrow. Even more useful is that you can turn today’s errors into tomorrow’s focus concepts.
One way to streamline your note-taking is to come up with abbreviations and stick with them. Here are some of mine:
- Acc: accurate
- Auto: automatic
- Dg: digraph
- SC: self correct
- T: tapped
- S/O: sounded out
When I see “acc/auto” next to the list of current words in Part 2 of the previous lesson, I know my student performed proficiently with the current concept. When I see “S/O” or “T,” I know that my student is not yet reading these words proficiently. These observations help me decide what goes on the next lesson plan.
In addition to these abbreviations, I add other qualitative notes. You don’t need to use complete sentences or even phrases! A single adjective can be enough to refresh your memory or suggest what to focus on next time. Words like choppy, many pauses, or hesitant tell you that your student needs review. Words like smooth, expressive, or confident suggest that maybe it’s time to move on or increase the challenge level.
One of the most important tips for writing your own Wilson Reading System lessons is to make sure that you take notes about student errors.

These notes give us invaluable information that helps us write the next lesson plan. If a student makes an error, write what they said or wrote next to what they should have said or wrote: sop/shop means they said sop for shop. It may be enough to just write the mispronunciation next to the actual word.
Why are these errors so important? The errors help you decide the “trouble spots,” and the trouble spots help you write the next lesson.
Unless you’re in your practicum, it’s likely that you’re the only person who is going to see your notes. They can be sloppy, and they can include weird abbreviations that you made up. As long as you can read and interpret them, you are all set!
Strategy #5: Prefill (or cross out) the easy stuff on the next blank lesson plan.
There are some things you’ll always include on the lesson plan. Likewise, in the first substeps, there are some things that will never be on the lesson plan. Remember this, and your planning will become 5% faster. (It adds up, I promise!) Here are some examples:
- In Steps 1 through 3, you know you’re going to include all of the single, short vowels in Parts 1 and 6.
- In Substeps 1.1 through 1.5, you know you can cross off the Word Elements sections in Parts 6 and 8.
- In 1.1, 1.2, and part of 1.3, you can cross off the Nonsense Words section in Part 8.
- In Substeps 1.1 through 1.3, you can cross off the Welded Sounds section in Parts 1 and 6.
Strategy #6: Use student errors to determine trouble spots, and then use that information to fill in selected sections.
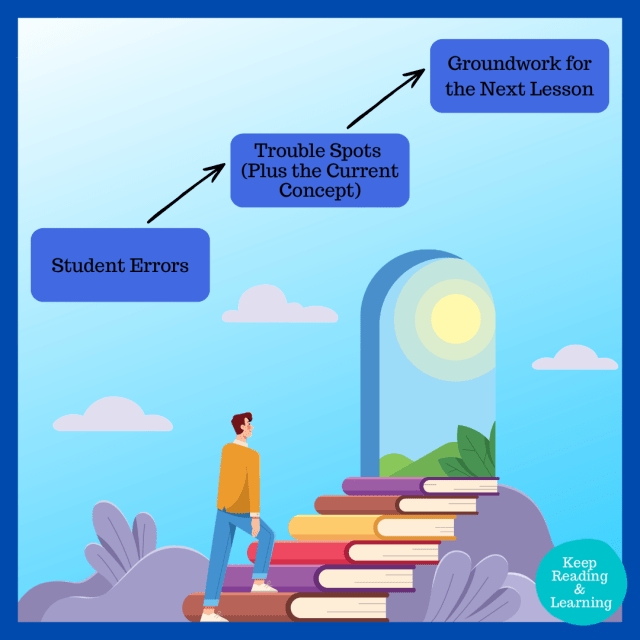
Today’s student errors will be recorded as tomorrow’s “trouble spots.” This is prescriptive instruction, and it is a significant part of what makes Wilson so effective.
Here’s what it looks like in action. If your student says sip for ship today, then differentiating between /s/ and /sh/ should show up in a few sections of tomorrow’s lesson plan:
- Part 1: Include s and sh in the Consonants section
- Part 2: Your Review Concepts section will list “s/sh,” and then you include words with s and sh in Review Words. Bonus points if you can make a word chain, like sip, ship, shop, shock, sock, sack, shack.
- Part 6: Include s and sh in the Consonants section.
- Part 7: Your Review Concepts section will list “s/sh,” and then you include words with s and sh in Review Words. Bonus points if you can make a word chain, like sip, ship, shop, shock, sock, sack, shack.
- Part 8: Include s and sh in the Sounds section. Sprinkle in a word or two with these sounds in the Real Words and/or Nonsense Words section.
After you’ve transferred these trouble spots into the next lesson, you’ve already got a great start on that next lesson!
Pro Tip: Write the trouble spots at the top of the second side of the lesson plan. Then you don’t have to flip the page back to the front side to remind yourself of the trouble spots as you plan Block 2.

Strategy #7: Use highlighters and colored pens for things you don’t want to forget.
I began using a highlighting strategy during my practicum and have kept using it since. If a lesson requires us to add a notebook entry (new sound, new spelling rule, new high frequency word, or new vocabulary word), I highlight the lesson plan where it says “Add to Notebook.” This calls attention to it and helps me make sure that I don’t forget. Then when I’m wrapped up in the lesson and moving along from one routine to the next, the highlighting reminds me to stop and make the necessary notebook entries.

Another favorite Wilson tutor lesson plan tip is to use erasable, colored gel pens. In my practicum, I color-coded my lessons to keep myself on track:
- The majority of my lesson was written in purple.
- Marking concepts were noted in red. If I saw a red box around all in the word stall, I knew that my intention was to discuss or review the concept of welded all.
- A green pen was used to remind me of steps to take or things to say. For example, I couldn’t always remember to have my students read their words back to me and mark some in Part 8 dictation of real words and nonsense words. I used my green pen to write, “Read, Mark” below the words I planned to dictate.
Part By Part Tips: Let’s Write a Wilson Lesson Together
With the basic strategies covered, let’s now walk through the process of writing Wilson Reading System lessons from Part 1 through Part 8. In front of you, you should have the last lesson you taught (with your notes on how your student did) and a blank lesson plan to begin filling out.
Remember, this post assumes that you are in or have completed the Level 1 practicum. This is not a “how to teach Wilson” post, but a “how to write your Wilson Reading System lessons more efficiently” post! The tips below do not cover all aspects of a Wilson lesson, so please use your training to fill in what I have left out.
Block 1
Part 1:
- Always include all the vowel sounds your students have learned.
- Refer to the Trouble Spots to choose sounds for the Consonants and Welded Sounds list. Then, sprinkle in a few more. Use your judgment and your training to decide which additional sounds to add.
- If your student had too many trouble spots to include, consider splitting them between Parts 1 and 6. For example, when my students have trouble with all of the –ng and –nk welded sounds, I include a few in both of these parts.
Part 2:
- Jot the Trouble Spots in the Review Concepts section. Select some words that address the trouble spots.
- If necessary, sprinkle in other concepts. Use your judgment and your training to decide which additional concepts to add.
- If you want to remind yourself to discuss concepts or marking, mark the words in a different color. Seeing the second color will remind you that you want to address it.

Part 3:
- A new vocab word today becomes a review vocab word tomorrow. It may also be appropriate to take the high frequency words you’re focusing on in Part 3 and include them in Part 7. You can do that now, while the targeted high frequency words are fresh in your mind.
- Remember the systems we put in place? Pull review words from your tracking sheet for high frequency words and vocabulary words.

Word Card Activities:
I like to stick with a game or activity for the phonetically regular word cards for a few sessions. This helps me stay organized, and it keeps things fresh for my students. All of the games I play involve zero prep and can easily be adapted to different substeps. We can play Mind Reader with 1.3 word cards just as easily as we can with 4.4 word cards!
Here’s how I might structure my Part 3 game plan. All my students play the same game for the same time period of time. In the first half of September, we might play Mind Reader with the cards during each lesson. For the second half of September, we switch to 20 Questions. In October, we play Slap a Sound for a couple of weeks, and then transition to another activity. Planning out the activities like this means that I can quickly fill in the Activity section without struggling to remember which group is playing which game. My students like knowing what to expect for a few sessions, but then they are happy when we switch to a new activity. And they love it when we cycle back to a game that they liked!
Note: Games and activities are not the only thing to complete with the phonetically regular word cards. Use your judgment and your training to balance accuracy-based and fluency-based activities.
Part 4:
- If your student read from page 59 today, you may be able to peek at page 60 while they’re coloring in their chart and see if page 60 looks appropriate for tomorrow. Then you can write “page 60” on the next blank lesson in the moment, and you won’t have to flip through the student reader later when you’re planning.
Part 5:
- Similar to the previous tip for Part 4, you may be able to choose the sentence reading page for your next lesson while teaching the current one. After they’ve read the sentences on page 68, there’s a good chance they’ll move on to page 69.
Note: It may not be appropriate to use the tips for Parts 4 and 5 while teaching. Sometimes, we can predict the pages we will use for the next lesson. Other times, we need to look at all of our notes on the completed lesson before we can choose the pages for the next lesson. You may also find that you don’t have the brain space to jot down notes while teaching. You may need more time getting used to teaching Wilson, or your brain just might not work that way. Use your judgment.
Block 2: Before you begin filling out this portion, take the Trouble Spots from the top of the first side and write them at the top of this side.

A key Wilson Reading System lesson plan idea is to remember the strategy of looking for patterns and cause-and-effect relationships. As we talk about Block 2, you’ll start to see parallels, particularly between Parts 1 and 6 and Parts 2 and 7.
Part 6:
- Always include all the vowel sounds your students have learned.
- Refer to the Trouble Spots to choose sounds for the Consonants and Welded Sounds section, and maybe even for the Word Elements section.
- Then, sprinkle in a few more. Use your judgment and your training to decide which additional sounds and word elements to add.
- If your student had too many trouble spots to include, consider splitting them between Parts 1 and 6.
Part 7:
- Jot the Trouble Spots in the Review Concepts section. Select some words that address the trouble spots.
- If necessary, sprinkle in other concepts. Use your judgment and your training to decide which additional sounds to add.
- If you want to remind yourself to discuss concepts or marking, mark the words in a different color. Seeing the second color will remind you that you want to address it.
- Which high frequency words did you focus on in Part 3? There’s a good chance that you want to include them in Part 7, too. If not, refer to your high frequency word tracker and select some words for review.
Part 8:
- Sprinkle the trouble spots in, along with the current concept and review concepts. (Thank goodness you write those trouble spots at the top of this side of the lesson plan! It’s really keeping you focused.) The mix of words you choose will come from your professional judgment and your training.
- Use a colored pen to mark the concepts that you want your students to mark. Seeing the marks in a contrasting color will help you remember your intention.
- Which high frequency words did you address in Parts 3 and 7? It may be appropriate to include them in the phrases. If not, refer to your high frequency word tracker and select some words for review.
Block 3, Part 9:
We follow a couple of patterns in Part 9. Students may complete a silent/oral reading procedure one day, and then a repeated reading procedure the next day. The story doesn’t change, so we can rewrite the title and simply check off a different box: silent/oral or repeated reading.
During my practicum, I found it difficult to remember all of the steps required for these tasks. My trainer helped me write out what steps to take each day, and then I made myself a reference sheet. I keep that reference sheet in my teacher binder, so I can flip to it if I need to refresh my memory on the Comprehension SOS strategy. I’m not able to share that here, but you can refer to your teacher manual to make a checklist for yourself.
One last tip is to have some prepared follow-up questions to ask when your student is done with a story. There are some questions that will be appropriate for many of the stories. One of my favorite questions to ask for the fictional passages is “How old do you think the character is? What clues did you read?” Answering this question requires students to use both literal and inferential cues from the text. Another option is to ask the student what they saw in their mind when they pictured the setting. Their answers to these two questions will likely reveal to you how well they understood the language used in the passage.
Final Thoughts on Wilson Reading System Lesson Planning Strategies
Writing efficient Wilson Reading System lessons isn’t about shortcuts that compromise your instruction. It’s about building systems that let your training do the heavy lifting, so you can spend less time staring at a blank lesson plan and more time actually teaching. Good systems, looking for patterns, taking solid notes, and a little color coding can turn lesson planning from a dreaded chore into something that feels almost automatic.
These are the Wilson lesson plan writing tips that have worked for me over the years, but every practitioner’s brain works a little differently. Take what’s useful, adapt what needs adapting, and leave the rest!
I want to hear from you! If you’ve got a system, a shortcut, or even a weird abbreviation that saves you time, share it in the comments or send me a message. I’d love to feature reader tips in a future post.
Happy planning!
Materials I Always Use When Writing My Own Wilson Lesson Plans
- Colorful, erasable gel pens. If you don’t use color-coding to stay organized, the colors will help you feel cheerful.
- Highlighters: highlight the things you don’t want to forget
- Binders and folders: Interested in a full tour of my lesson plan binder? Let me know!
- Post-It flags to mark the sections in both my binder and my students’ binders
Tools I Created to Support My Structured Literacy Lesson Planning
Explore resources I use to stay organized and plan efficiently.
You may be interested in these posts for reading interventionists:
- When Reading Is Strong but Spelling Isn’t: A Focus Guide for Steps 1 and 2
- How to Teach Virtual Wilson Reading System Lessons Without Fancy Tech
- Routine Without the Rut: How to Keep Structured Literacy Lessons Engaging
This post is an independent product and is not affiliated with, nor has it been authorized, sponsored, or otherwise approved by Wilson Language Training Corporation. WILSON®, Wilson Reading System®, Fundations®, Just Words®, and Wilson Fluency® are trademarks and/or registered trademarks of the Wilson Language Training Corporation.

